Friday, September 27, 2013

Project #3- Shiny Silver Dresser

I took a turn for the girly recently when I decided I wanted to do a fun, anything-goes metallic bedroom for my new house in Arizona. After spending hours online hunting for metallic dressers, I determined that they were just too outrageously expensive, especially when I was starting from scratch in a new state.

I went to Ikea, and found this lovely gem: TARVA 6-drawer chest IKEA Made of solid wood, which is a durable and warm natural material.
Ikea Tarva 6-drawer chest, $149.00

This dresser is very large (perfect as I was downsizing from a chiffonier and a dresser to just a dresser) and also very sturdy. But the best thing about it is that the dresser is unfinished (read: blank canvas!!).

I put together the dresser, left off the ugly wooden knobs, bought a can of Krylon metallic silver foil spray paint, and went to town!

Before spray!


After spray painting!

Adding the cutest ever crystal knobbies, and putting it in my room!

A few extra crystal knobbies for my darling fretwork accent table from Target!


This project was seriously the easiest project ever. The only thing that sucked was putting together the dresser, but that's Ikea for you! 

Happy crafting!


Saturday, January 26, 2013

Project #2- Making a Duvet Functional

I used to think that using a duvet on your bed was a miserable idea. My sister had one, and I remember her complaining about the insert bunching up at the bottom of the bed. I have always just used comforters or coverlets to avoid this, and last winter I made the mistake of buying a truly heinous comforter on a whim. I also have a problem with being whatever the opposite of a hoarder is, so of course I chucked out my last comforter that was actually decent looking. So this winter, I've been rocking my coverlet that I use during the summer. In this awful Utah winter, that pretty much means I've been freezing to death.

When I worked at Crate and Barrel, I learned that not all duvets had to be a nightmare. They have these awesome little ties on the inside that connect the insert to the cover, which makes putting them over the insert as well as making the beds (over.. and over.. and over again) a breeze. Unfortunately, Crate's duvets and inserts are super expensive. Pottery Barn also does the smart-tie system, but again, they are very expensive. Ikea has very reasonably priced inserts and covers, and you can even select the weight of your insert. Unfortunately, they don't have the fancy ties.

My cute mom bought me a gorgeous bedding set from Ikea for Christmas this year, and I made it through two washes of the duvet cover before realizing I couldn't do the bunchy, messy, hard-to-get-in-and-out duvet thing. I decided project #2 would be trying to make my duvet just like the C&B duvets but without the price tag.

I should probably preface this post by saying that I cannot sew. Period. It's not like I'm a little bit bad at it. I SUCK. In fact, in seventh grade I made my friend Emily sew my pillowcase for me when the teacher left the room because my first set of stitches were so jagged I ended up having to pick them all out, ripped the fabric in the mean-time, and had to shorten it to a throw pillow. I mention this because it should give you confidence- if you have a sewing ability better than a 2-year-old, you CAN do this.

So, I started off by taking a t-shirt and cutting the hems off the sleeves and the bottom. I'm sure you could use ribbon, too, but the t-shirt kind of seemed like it would hold up against my rotten sewing better.I also started using white thread, thinking that once I got to the ties on the cover that you would not be able to see my sewing if/when I accidentally sewed away from the seam I was trying to hit.


So, I sewed the t-shirt across my insert corners, making kind of a strap.

Somewhere in the middle of this, my white thread disappeared, and I suspect my pup Wookie had something to do with this. (*Later update, found the thread with Wookie teeth marks all over it, so suspicions were confirmed.) I switched to another thread that was a lot thicker and caused a lot more tangle-ups, but it got the job done.

Please also note my completely crappy stitching ability. I made these little straps on all four of the corners.

Then I got to work on the duvet cover.I tried to stay on the inside seams (I had about half an inch of wiggle-room) so that you couldn't see my ties or the sewing I did to attach the ties from the outside. I pretty much just folded a longer piece of t-shirt in half, and then sewed the middle of the tie to the seam of my duvet cover.

I'll have you know I did this right before a duvet cover washing, and as crappy as it looks, it totally stood the test. 

Once my duvet cover was out of the wash, I attached the corners to each other by tying the ties around the straps. It was super easy to get my duvet cover on, and could shake it out without worrying about holding the corners.


And... voila! cutest, straightest duvet ever. And for about a fourth of the cost of what I would have paid at C&B or Pottery Barn. 


Sunday, December 9, 2012

Project #1- Organization Board

Welcome to my first DIY project altered for my "handy"-cap. It's an organization board that I would totally recommend for anyone who, like me, loves making lists. 


The end result!


This board was my inspiration.

Check out Girl Loves Glam here. She is super-duper crafty.

So, once I saw this post, the part of Kelsi that likes to think she's crafty got to thinking that I could do this on my own, no problem! Girl Loves Glam used a piece of plywood cut to 19x31, a paper mache box for the pen cup, vinyl chevron print, and paint to make this gorgeous piece of organizational art.

Now, here comes the part where I have a handy-cap. I am completely ditsy when it comes to knowing how to buy this kind of stuff. I rolled into Home Depot and went down the plywood aisle, excited to find a cut piece of 19"x31" plywood. (Ok, I didn't think I'd find EXACTLY this size, but I was expecting close...) So, you can imagine my shock when the smallest was 4'x8'. How was I even going to get that home? Do I look like the type of person with a tool bench in my tool shed with 50,000 saws and doodle-bobbers that, I dunno, cut wood and stuff? I don't even know what you would use to cut a 4x8 piece of wood, let alone know how to cut it straight and not chop off my fingers or get impaled by flailing wood chips. In case this rant wasn't explanatory enough, cutting the plywood was out of the question. 

Next on my list of problems was that I was under the impression I was just going to walk into a craft store and find the perfect paper mache circle box to hold my pens. Joke was on me again because I could find every shape except cylindrical. And the cute star with the lid wasn't going to cut it.

Last, I didn't realize that vinyl chevron print was something I was going to have to have a fancy-cutter for or order from some fancy-cutter owner on Etsy. I don't even remember what the machine you use to cut sheets of vinyl is called. I'm just glad I resisted my urge to attempt to cut chevron on vinyl sheets using good 'ole scissors. That would have gone very poorly. 

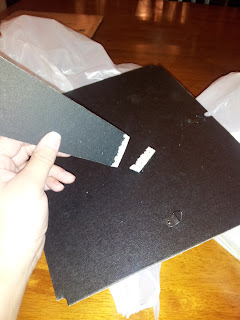
Fortunately, what I lack in craftiness I make up for in resourcefulness. I found a foam board at the craft store (I've seen them at Target too, but not as thick as the one at the craft store). I think mine is like half an inch thick, but it is 20"x30", which turns out to be the perfect size, no cutting involved. Another benefit is that it is lightweight, and I hung my whole board on the wall using command strips instead of nailing it in. The final benefit is the price. At $3.50, it was quite a bargain in comparison to the plywood.

I spray painted the foam board using spray paint I bought at Home Depot for like 4 dollars. I didn't spray the edges because I kind of liked the white contrast, but you could paint the edges if you like. The foam board didn't take a very thick coat to cover it all, and it was dry in about an hour. 

I considered leaving the organization board just the pretty slate blue color, but I really wanted it to be a bit more interesting. I realized that chevron was probably a bit too complicated for my wheelhouse, so I settled on stripes and found a roll of white duct tape to accomplish this. At $3.99, it was much less expensive than the vinyl would have been. And it really does look good, I swear!


About halfway there...


All done! Would you know it was duct tape?

The duct tape was where my first faux pas really happened. I learned that my teething puppy would think duct tape was a delicious chew toy, but that it would stick to his fur just as well as anything else. So not only was I picking little black hairs off my duct tape during the whole process, I ended having to gently pry it from his whiskers too. In hindsight, I would have put Wookie in his kennel during this craft project.

From here, the easy part started. I found a pen cup at Walmart for super cheap, and it fit 3 pens and an eraser, so it was a little bigger than the paper mache cup.


I also found 2 8x10 frames and 2 5x7 frames that were all from the same family at Target. I broke the stands off the back so that they would sit flat when I used command strips to stick them to the board. 


I got two clips from Walmart that I use as a grocery list holder and a receipt holder. Instead of printing off grocery list printables I just got a cute post-it book at Target. 

I used the printables for the Calendar, Menu, and To Do List because they matched my color scheme and I loved the font.


Last was the chore chart. Girl Loves Glam used one found on Brown Paper Packages, but some of the cleaning duties she uses aren't ones that apply to me, so I just went into paint and copied the style. I did Daily, Weekly, and Monthly chores that really apply to me. I wipe off the Weekly chores on Friday so that I can have time to start on the weekends and wipe of the monthly chores on the first day of the month when I redo the calendar. 


I'm super happy with the end result, and it's super functional on top of being really pretty. And the best part is that it only cost me about $23, with everything, and only took about an hour of my time. This is a DIY success!


husband-less and not-so-crafty

Hello lovely readers! This is Kelsi here coming to you with a Pinterest-inspired mission to make all of the stellar crafts we see more user-friendly for those of us who don't have Ty Pennington for a husband.

Seriously. How many times have you fallen in love with someone's DIY project and gone on a mission to find all the best materials before realizing that there's no way you can do this on your own? I usually then go back and re-read the blog, paying careful attention to how many times the blogger's poor husband had to help out.

I am going to attempt to do all of my DIY tasks husband-less and with the knowledge that my craftiness is sub-par at best. So sit back and enjoy the ride, because I guarantee I'll have enough screw-ups to bring some hilarity to the table.