Welcome to my first DIY project altered for my "handy"-cap. It's an organization board that I would totally recommend for anyone who, like me, loves making lists.
The end result!
This board was my inspiration.
Check out Girl Loves Glam here. She is super-duper crafty.
So, once I saw this post, the part of Kelsi that likes to think she's crafty got to thinking that I could do this on my own, no problem! Girl Loves Glam used a piece of plywood cut to 19x31, a paper mache box for the pen cup, vinyl chevron print, and paint to make this gorgeous piece of organizational art.
Now, here comes the part where I have a handy-cap. I am completely ditsy when it comes to knowing how to buy this kind of stuff. I rolled into Home Depot and went down the plywood aisle, excited to find a cut piece of 19"x31" plywood. (Ok, I didn't think I'd find EXACTLY this size, but I was expecting close...) So, you can imagine my shock when the smallest was 4'x8'. How was I even going to get that home? Do I look like the type of person with a tool bench in my tool shed with 50,000 saws and doodle-bobbers that, I dunno, cut wood and stuff? I don't even know what you would use to cut a 4x8 piece of wood, let alone know how to cut it straight and not chop off my fingers or get impaled by flailing wood chips. In case this rant wasn't explanatory enough, cutting the plywood was out of the question.
Next on my list of problems was that I was under the impression I was just going to walk into a craft store and find the perfect paper mache circle box to hold my pens. Joke was on me again because I could find every shape except cylindrical. And the cute star with the lid wasn't going to cut it.
Last, I didn't realize that vinyl chevron print was something I was going to have to have a fancy-cutter for or order from some fancy-cutter owner on Etsy. I don't even remember what the machine you use to cut sheets of vinyl is called. I'm just glad I resisted my urge to attempt to cut chevron on vinyl sheets using good 'ole scissors. That would have gone very poorly.
Fortunately, what I lack in craftiness I make up for in resourcefulness. I found a foam board at the craft store (I've seen them at Target too, but not as thick as the one at the craft store). I think mine is like half an inch thick, but it is 20"x30", which turns out to be the perfect size, no cutting involved. Another benefit is that it is lightweight, and I hung my whole board on the wall using command strips instead of nailing it in. The final benefit is the price. At $3.50, it was quite a bargain in comparison to the plywood.
I spray painted the foam board using spray paint I bought at Home Depot for like 4 dollars. I didn't spray the edges because I kind of liked the white contrast, but you could paint the edges if you like. The foam board didn't take a very thick coat to cover it all, and it was dry in about an hour.
I considered leaving the organization board just the pretty slate blue color, but I really wanted it to be a bit more interesting. I realized that chevron was probably a bit too complicated for my wheelhouse, so I settled on stripes and found a roll of white duct tape to accomplish this. At $3.99, it was much less expensive than the vinyl would have been. And it really does look good, I swear!
About halfway there...
All done! Would you know it was duct tape?
The duct tape was where my first faux pas really happened. I learned that my teething puppy would think duct tape was a delicious chew toy, but that it would stick to his fur just as well as anything else. So not only was I picking little black hairs off my duct tape during the whole process, I ended having to gently pry it from his whiskers too. In hindsight, I would have put Wookie in his kennel during this craft project.
From here, the easy part started. I found a pen cup at Walmart for super cheap, and it fit 3 pens and an eraser, so it was a little bigger than the paper mache cup.
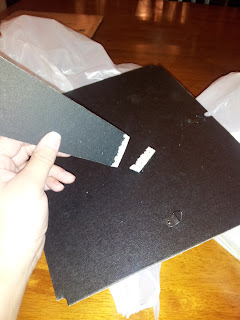
I also found 2 8x10 frames and 2 5x7 frames that were all from the same family at Target. I broke the stands off the back so that they would sit flat when I used command strips to stick them to the board.
I got two clips from Walmart that I use as a grocery list holder and a receipt holder. Instead of printing off grocery list printables I just got a cute post-it book at Target.
I used the printables for the Calendar, Menu, and To Do List because they matched my color scheme and I loved the font.
Last was the chore chart. Girl Loves Glam used one found on Brown Paper Packages, but some of the cleaning duties she uses aren't ones that apply to me, so I just went into paint and copied the style. I did Daily, Weekly, and Monthly chores that really apply to me. I wipe off the Weekly chores on Friday so that I can have time to start on the weekends and wipe of the monthly chores on the first day of the month when I redo the calendar.
I'm super happy with the end result, and it's super functional on top of being really pretty. And the best part is that it only cost me about $23, with everything, and only took about an hour of my time. This is a DIY success!


